Configure Microsoft CA Proxy
Complete the following to configure the Microsoft CA Proxy:
Step 1: Create a client authentication template for Microsoft CA
-
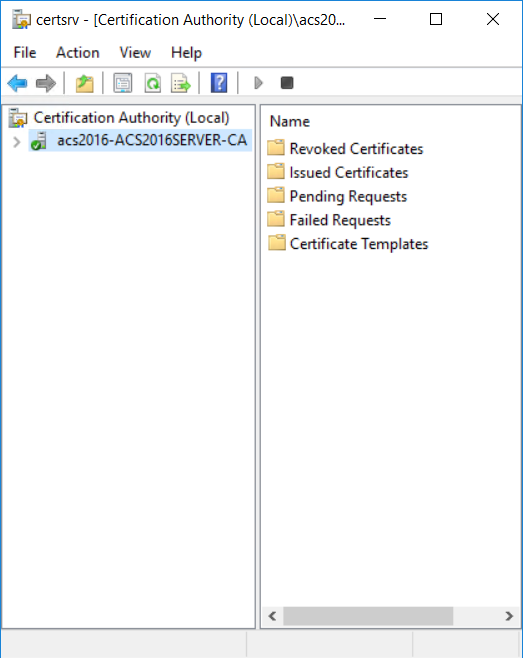
On the Microsoft CA machine, go to Start > Windows Administrative Tools > Certification Authority.
-
Click your Certificate Authority to expand the root folder.
-
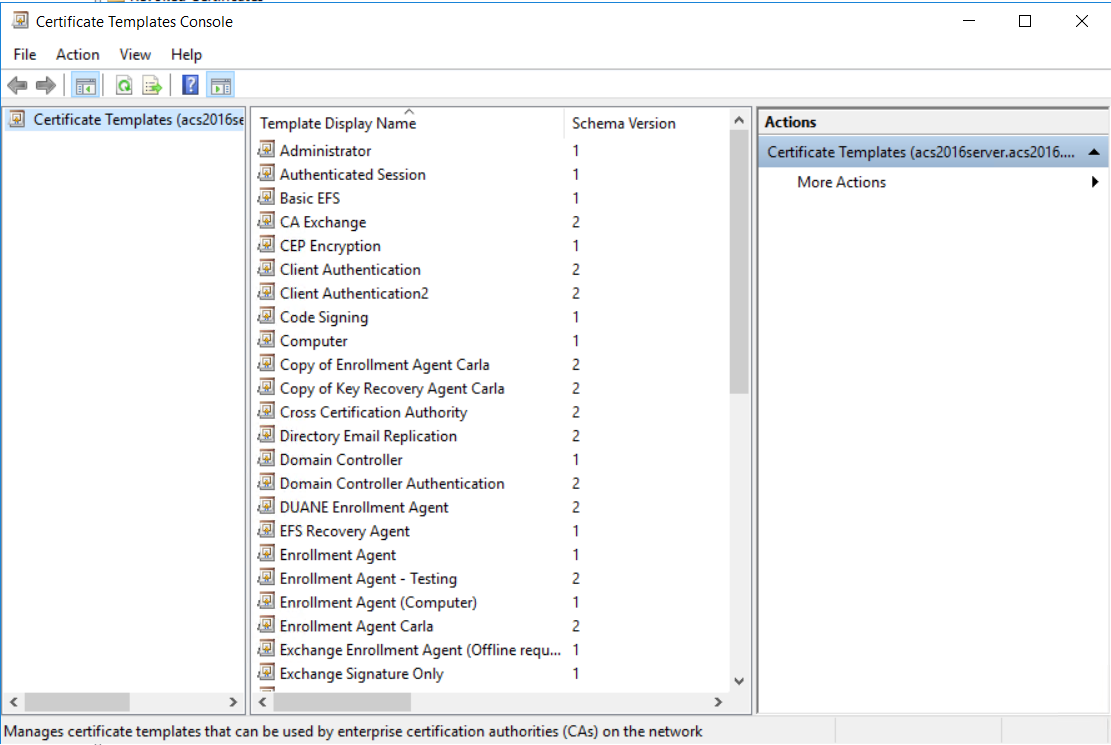
Right-click Certificate Templates, and then select Manage. The Certificate Templates Console appears.
-
Scroll the template list, right-click the User template and select Duplicate Template. The Properties of New Template dialog box appears.
-
Click the Security tab and under Permissions for Authenticated Users reduce the permissions to no more than Read.
-
Add the
<domain_user>and select Read and Enroll. -
For all other users and groups, review the permissions and ensure that they have the desired corporate access policy.
-
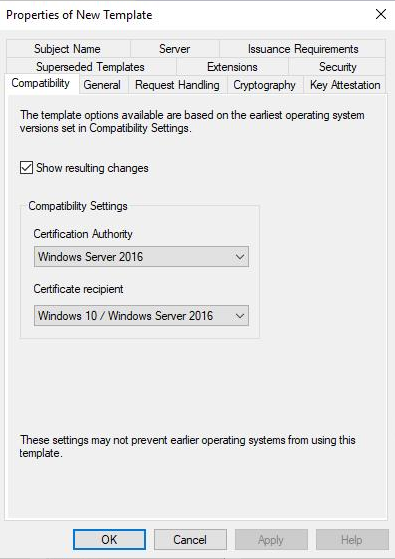
In the Compatibility Settings, select the following:
- From the Certificate Authority drop-down list, select
- Windows Server 2012R2 if you are running on a 2012R2 server
- Windows Server 2016 if you are running on Windows Server 2016 or later
- From the Certificate Recipient drop-down list, select
- Windows 8.1/Windows Server 2012R2 if you are running on a 2012R2 server
- Windows 10/Windows Server 2016 if you are running on Windows Server 2016 or later
- Optional. If the Show resulting changes check box is selected, a message lists the options that will be added with your choice. Click OK to close the message.
- From the Certificate Authority drop-down list, select
-
Click the General tab.
-
In the Template display name field, enter
Client Authentication. -
Review the Validity Period. Extend it if necessary.
-
Click the Subject Name tab.
-
Select Supply in the request radio button and click OK on the warning dialog box.
-
Click the Extensions tab.
-
Select Applications Policies and click Edit. The Edit Application Policies Extension dialog box appears.
-
Select and remove Encrypting File System and Secure Email and then click OK.
-
Click OK to close the Properties of Template dialog box.
-
Return to the Certification Authority.
-
Click to expand your certification authority root folder.
-
Right-click Certificate Templates and select New > Certificate Template to Issue. The Enable Certificate Templates dialog box appears.
-
Select Client Authentication and click OK.
Step 2: Generate the Microsoft CA Proxy Server truststore
-
On the Microsoft CA Proxy Server machine, create an SSL directory under MS CA Proxy installation (for example,
c:\mscaproxy\ssl). -
Open a command prompt.
-
Run the following commands where
truststorepwd= The trust store passwordca_host= CA host nameca_name= CA name. You can find the CA name at Certification Authority > Properties > General > Name.
certutil -config <ca_host>\<ca_name> -ca.cert caroot.cer -
In this directory, run the following command to include the root CA certificate (for example,
caroot.cer)keytool -import -noprompt -alias caroot -file caroot.cer -keystore truststore.jks -storepass <truststorepwd> -
If your CA has intermediate CA certificates, obtain these certificates from your CA then run the following command for each of them to import the corresponding issuing certificate (for example,
ca-issuing.cer).”keytool -import -noprompt -alias ca-issuing -file ca-issuing.cer -keystore truststore.jks -storepass <truststorepwd>
Step 3: Configure SSL for the Microsoft CA Proxy Server
To configure SSL for the Microsoft CA Proxy Server, you need to generate a mscaproxy.jks keystore containing the following:
- The Microsoft CA Proxy private key for SSL server authentication
- The key's certificate
- The certificate chain
- The Microsoft CA Proxy certificate
Generate a Server JKS
-
On the Microsoft CA Proxy Server machine, go the SSL directory under the Microsoft CA proxy directory (
c:\mscaproxy\ssl). -
Open a command prompt.
-
Run the following commands where
keypwd= private key passwordkeystorepwd= JKS passwordca_proxy_fqdn= Microsoft CA proxy server fully qualified domain name.ca_host= CA host nameca_name= CA name. You can find the CA name at Certification Authority > Properties > General > Name.
keytool -genkey -noprompt -alias mscaproxy -dname "cn=<ca_proxy_fqdn>" -keyalg RSA -keysize 2048 -keystore mscaproxy.jks -storepass <keystorepwd>keytool -certreq -alias mscaproxy -ext SAN=dns:"<ca_proxy_fqdn>" -file mscaproxy.csr -keystore mscaproxy.jks -storepass <keystorepwd>certreq.exe -f -attrib "CertificateTemplate:WebServer" -config "<ca_host>\<ca_name>" mscaproxy.csr CertChainFileOut mscaproxy.p7bkeytool -import -noprompt -alias mscaproxy -file mscaproxy.p7b -keystore mscaproxy.jks -storepass <keystorepwd>keytool -export -noprompt -alias mscaproxy -file mscaproxyserver.cer -keystore mscaproxy.jks -storepass <keystorepwd>
Note: You need the generated mscaproxyserver.cer file located in the ssl directory when you Configure a Microsoft CA in Identity as a Service.
Step 4: Generate a Client PKCS12 for Identity as a Service
To generate a client PKCS12, you need to generate a mscaproxyclient.pfx keystore containing the following:
- The CA Gateway's private key for client authentication
- The key's certificate
- The certificate chain
Generate a client PKCS12
-
On the Microsoft CA Proxy Server machine, create a client directory under the Microsoft CA proxy directory (
c:\mscaproxy\client). -
Open a command prompt.
-
Run the following commands where
keystorepwd= the PKCS12 passwordca_host= CA host nameca_name= CA name. You can find the CA name at Certification Authority > Properties > General > Name.
keytool -genkey -noprompt -alias mscaproxyclient -dname "cn=mscaproxy client" -keyalg RSA -keysize 2048 -keystore mscaproxyclient.pfx -storetype PKCS12 -storepass <keystorepwd>keytool -certreq -alias mscaproxyclient -file mscaproxyclient.csr -keystore mscaproxyclient.pfx -storepass <keystorepwd>certreq.exe -f -attrib "CertificateTemplate:ClientAuthentication" -config "<ca_host>\<ca_name>" mscaproxyclient.csr CertChainFileOut mscaproxyclient.p7bkeytool -import -noprompt -alias mscaproxyclient -file mscaproxyclient.p7b -keystore mscaproxyclient.pfx -storepass <keystorepwd>
You need the generated mscaproxyclient.pfx file located in the client directory when you Configure a Microsoft CA in Identity as a Service.
Step 5: Edit the application.yml file and the keystore and truststore passwords
- On the Microsoft CA Proxy Server machine, go to
<msca_install>/configand openapplication.ymlwith a text editor. - Uncomment all lines in the file by removing the #.
- Save and close the file.
- Go to
<msca_install>/configand openkey-store-password.scrtwith a text editor. - Set
decrypted=<keystorepwd>where<keystorepwd>is the password of the JKS file you created in the section, "Configure SSL for the Microsoft CA Proxy Server." - Save and close the file.
- Go to
<msca_install>/configand opentrust-store-password.scrtwith a text editor. - Set
decrypted=<truststorepwd>where<truststorepwd>is the password of the JKS file you created in the section, "Generate the Microsoft CA Proxy Server truststore." - Save and close the file.
Step 6: Manage the Microsoft CA Proxy
As administrator, use the following commands to manage the Microsoft CA Proxy Server machine:
MSCAProxy startMSCAProxy stopMSCAProxy uninstallMSCAProxy restart
You can also check to see whether the Microsoft CA Proxy is running.
Check to see if the Microsoft CA Proxy is running
-
Open Chrome.
-
Start the Microsoft CA Proxy as follows:
From a command prompt, enter
C:\\cd mscaproxyC:\mscaproxy\>MSCAProxy.exe start -
Import into Chrome the
mscaproxyclient.pfxfile you created in Step 4: Generate a client PKCS12 for Identity as a Service. -
Go to: https://proxyserver:8443/MSCAProxy/rest/status/ping, where proxyserver is the hostname of your Microsoft CA Proxy Server.
-
Check the server response for the following message to confirm that the Microsoft CA Proxy is running:
"MS CA proxy is running"